 ENGLISH TRANSLATION
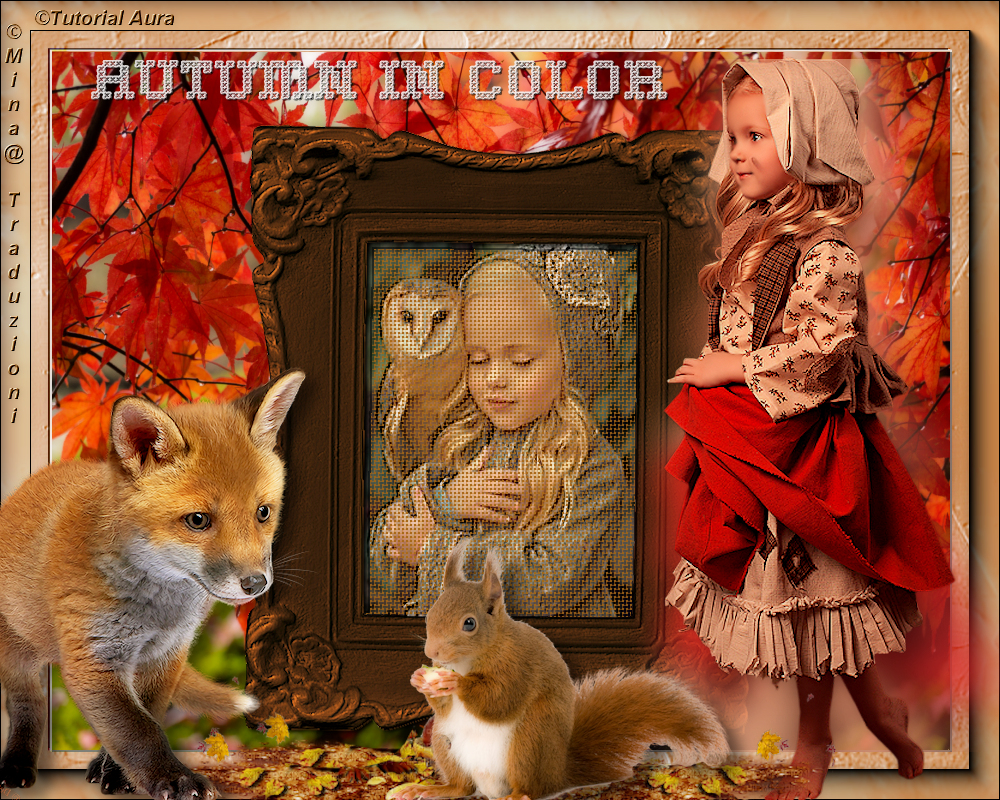
COLORI D'AUTUNNO - Autumn colors
This tutorial was created as a blind lesson
for the friends of non solo grafica-googlegroups
September 2019
for the friends of non solo grafica-googlegroups
September 2019

The tutorial is my work
Any resemblance to any other tutorial is purely coincidental
A special thanks to the creators of tubes
who, with their effort, often unrecognized
allow us to make our works.
The copyright belongs to the original artist.
(you find here the links to the material authors' sites)
******
Here you find the original of this tutorial:


******


****
Let's start:
Step 1.
1.1 Open a new transparent image 900 x 700 pixels
1.2 Flood Fill the transparent image with an autumn color - I used #bf691f.
1.3 Selections>Select All.
1.4 Open your landscape image and go to Edit>Copy.
1.5 Go back to your work and go to Edit>Paste into Selection.
1.6 Selections>selection none
*****
Step 2.
2.1 Open the frame and go to Edit>Copy,
2.2 Go back to your work and go to Edit>Paste as new layer in the middle of the tag and slightly downwards.
(I chose the "immagine 5" frame: image / resize to 85% / resize all levels unchecked)
(if, on the other hand, you choose the other frames - 0_964ce_56a580c_L, the dimensions will be the same)
2.3 With the rectangle selection (feather 0) select the frame as follow:
 *****
*****
Step 3
3.1 Open a new layer and place it below the frame level.
3.2 open a tube of a portrait (or other): edit / copy
3.3 go back to your work: edit / paste in the selection.
(If your tube is deformed, paste it as a new layer, select invert and then press the delete key)
3.4 Effects/User defined Filters/Filter Emboss3
3.5 Selections>selection none
*****
Step 4.
4.1 Activate the frame layer
4.2 With the magic wand (tolerance and feather 0) select the inside of the frame
4.3 effects / 3d effects / drop shadow as follow:


4.7 Selections>select none


mail mina:

mail aura:


A special thanks to the creators of tubes
who, with their effort, often unrecognized
allow us to make our works.
The copyright belongs to the original artist.
(you find here the links to the material authors' sites)
english version - Translation by Mina - 12.10.2019
This tutorial was translated with Corel X8,
but it can also be made using other versions of PSP.
Here you find the original of this tutorial:

material required:
one or more tubes of your choice, a landscape picture
MY SUPPLIES
DOWNLOAD HERE
-1 mask : Akre_FreebiePapers 2
- 2 frames
PLUGINS
*****
Many thanks to Renee Graphisme for permission to use its filter page
IF You find any recalcitrant filter you can consult the tips and tricks page - thanks Renee

You can change Blend Modes and opacity of the layer, according to your colors.
Open the mask in PSP
install the filter in the folder where you keep the Plugins
Let's start:
Step 1.
1.1 Open a new transparent image 900 x 700 pixels
1.2 Flood Fill the transparent image with an autumn color - I used #bf691f.
1.3 Selections>Select All.
1.4 Open your landscape image and go to Edit>Copy.
1.5 Go back to your work and go to Edit>Paste into Selection.
1.6 Selections>selection none
*****
Step 2.
2.1 Open the frame and go to Edit>Copy,
2.2 Go back to your work and go to Edit>Paste as new layer in the middle of the tag and slightly downwards.
(I chose the "immagine 5" frame: image / resize to 85% / resize all levels unchecked)
(if, on the other hand, you choose the other frames - 0_964ce_56a580c_L, the dimensions will be the same)
2.3 With the rectangle selection (feather 0) select the frame as follow:
Step 3
3.1 Open a new layer and place it below the frame level.
3.2 open a tube of a portrait (or other): edit / copy
3.3 go back to your work: edit / paste in the selection.
(If your tube is deformed, paste it as a new layer, select invert and then press the delete key)
3.4 Effects/User defined Filters/Filter Emboss3
3.5 Selections>selection none
*****
Step 4.
4.1 Activate the frame layer
4.2 With the magic wand (tolerance and feather 0) select the inside of the frame
4.3 effects / 3d effects / drop shadow as follow:
color black - also in negative (V -2 /H -2)
4.4 Activate the portrait (or other) layer
4.5 Effects/Texture effects/Weave as follov:
my colors: weave color #d47c1b /gap color #a96a1b
fill gaps checked
4.6 Effects/User defined Filters/Filter Emboss34.7 Selections>select none
*****
Step 5.
5.1 Image/Canvas size as follow:
5.2 Layer>New raster layer
5.3 flood fill with the foreground color #bf691f
5.4 Selections/Select all, selection modify>contract 50 pixels
5.5 Press delete key
5.6 Selections/invert
*****
Step. 6
6.1 Layer>New raster layer
6.2 flood fill with color #ffffff
6.3 Layers/new mask layer/from image as follow:
6.4 choose the mask "Akre_freebiepapers2"
6.5 Layers/merge/merge group
6.6 layers/duplicate
6.7 Image/mirror/mirror horizontal
6.8 image/mirror/mirror vertical
6.9 Reduce the opacity of this layer to 50
6.10 Selections/select none
*****
Step 7.
7.1 Layers/merge/merge down 2 times
7.2 Effects/User defined Filters/Filter Emboss3
7.3 Layers/Duplicate
7.4 image/flip/flip vertical
7.5 reduce the opacity of this layer to 50%
7.6 layers/merge down
7.7 Effects/User defined Filters/Filter Emboss3
7.8 Activate the layer of frame-border
7.9 Selections/Select all
7.10 Selections/Select all, selection modify>contract 50 pixels
7.11 effects / 3d effects / drop shadow as follow:
color black - also in negative (V -2 /H -2)
7.12 selections / select none
*****
Step 8
Stay on this level
8.1 Effects/Plugins/AAA frames : Foto frame 30 as follow:
8.2 Activate the top layer
8.3 Open your tube, (if there is remove the watermark) and go to Edit>Copy.
8.4 Go back to your work and go to Edit>Paste as new layer.
8.5 Layers/duplicate
8.6 Activate the layer of original tube
8.7 Image/Resize to 120%
8.8 Adjust >Blur> gaussian blur radius 20
8.9 place the gaussian around the tube like in my original tag
8.10 Adjust/Brightness and contrast/Fill light/clarity as follow
8.11 Activate the layer of the tube original and with the rectangular selection tool,select the shadow that comes out and press the delete key as follow:
******
Step 12.
12.1 Add if you want more tubes
If you want to do the animation don't close the levels and go to step animations
12.2 Add your signature or watermark
12.3 Merge/merge all flatten
12.4 File/ export/JPEG optimizer/compression 20
*****
STEP "Animation"
If you want, make an animation of your pleasure.
For example, add a little squirrel.
layers/Duplicate twice and rename S1, S2, S3.
Close S1
*****
Apply the Warp brush, right twirl tool,to make the head spin a little, adapting the size to the squirrel's head as follow:

(these settings refer to my squirrel - you can change them based on the size of your tube)
*****
Close S2 and open S3
Apply the Warp Brush /Expand, to enlarge a little the ears as follow:

Then open the clone tool and take the size of the eye

Then put the clone brush on the squirrel's forehead and right click,

then go on the eye and with the left button close it with the clone of the forehead

LET'S GO TO ANIMATION SHOP
- Close S3 and open S1
Edit/copy special/copy merged
Go to AS and paste into AS as new animation
Close S1 and open S2
Edit/copy special/copy merged
Go to AS and paste after the current frame
Close S2 and open S3
copy merge
and paste in As after the current frame.
Select everything and put it as speed 25

I hope you enjoyed the tutorial
My versions
animated version
*****
If you have problems or doubts, find a link not working, or wish to tell me that you enjoyed this tutorial, please write to me.
mail mina:
mail aura:
*******
https://mina-traduzioni.blogspot.com/
Nessun commento:
Posta un commento